Cleaning your crash helmet is a very important task that you must learn to do if you plan on owning a motorcycle.
It involves not only cleaning the outsides of it but the insides as well.
A good clean would not only ensure the increased lifespan of your helmet but would protect your own health as well.
Below is a step by step method which you can follow to clean helmet properly and hygienically without causing damage to it.
Steps to clean helmet properly:

- Stage 1: Dissection
The first step involves taking off every detachable component of the helmet, both internally and externally. Take note of where everything goes because you will need to put them back into place when you’re done.
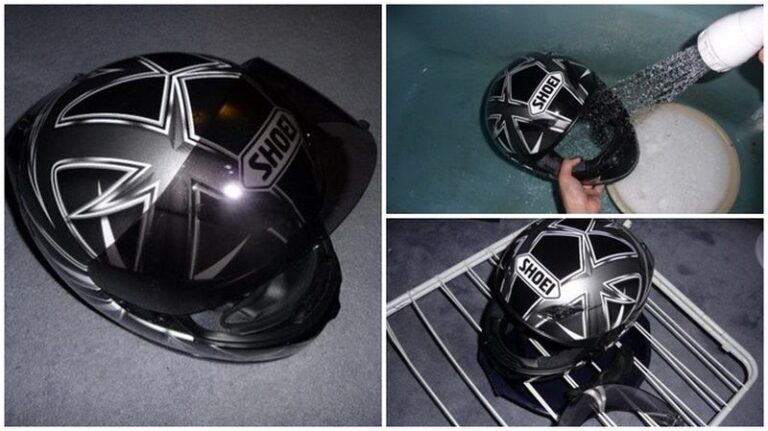
- Stage 2: The Clean
Start by laying a towel down in your bath and rest the lid of the helmet in it so as to prevent any scratches to both helmet and bath. Next, take the shower head and soak the lid with lukewarm (not hot) water. Ensure the pressure is strong enough but not too high, then gently massage the water in. Apply some PH-neutral shampoo (preferably baby shampoo) into the helmet lining then scrub gently to remove the grime. Wash everything including the chin strap and neck lining – areas that give off the most unpleasant smells and parts that cannot be removed. Once satisfied with your washing, rinse off the helmet by massaging lukewarm water into it again then wipe the outer shell with a flannel or damp cloth to expel any bugs. Repeat the rinsing process on every part of the helmet, including areas that could not be removed, then wipe the visor with the flannel. Make sure that you remove any installed system like a Pin-lock or any similar system before you clean helmet.
- Stage 3: Drying
You may feel tempted to use a hair dryer to dehydrate the helmet but please don’t. It could melt the protective polystyrene layer and render the helmet useless. You can dry your helmet by simply placing the helmet on a dry towel and setting it in a way that would allow air circulate, then leave it to dry naturally in a warm room. It could take days for the helmet to dry off completely, so don’t feel tempted to place it under direct sunlight. Also, avoid keeping it close to hot locations like a radiator or on a boiler.
- Stage 4: Reassembly
This here is the tricky part. You should have no problem putting back the parts together if you had carefully memorized taking them off. If you do get stuck, consulting the owner’s manual for directions is your next best option. Your local bike shop should also be helpful and if you prefer the DIY approach, you can always count on the internet for guidance.
Being able to clean helmet yourself isn’t a difficult task, most people just see it as physically draining or are downright lazy to do it. You have to understand that the effect of this negligence can cause serious health problems to you. So to better protect yourself and your well-being, you should endeavor to clean helmet at least once or twice in a year. Following the steps outlined above is the simplest and most basic explanation of how to go about it. Good luck and have a safe ride!
Here is a video that covers the process of cleaning motorcycle helmet: