If you love riding and own a motorcycle of your own, then you must know every basic maintenance skill. If the battery of your motorcycle is dead and needs a replacement then the process for changing the battery requires proper knowledge. If you know the proper process then instead of buying the new motorcycle you can save money by just replacing it with a new battery. The process to install and remove a motorcycle battery is not that difficult; you just need to follow the steps properly.
There are many ways to install a battery, but I have brought the easiest way through which you can replace the old battery with the new one. If you want a smooth installation experience then you need to follow the steps precisely. Now, sit back and read the article carefully so that you can remove the battery and install the new one all by yourself instead of concerning a mechanic. There are several steps that you need to follow, and you will successfully change the motorcycle battery easily at your home.
How To Install and Remove A Motorcycle Battery
Removing and installing a new motorcycle battery is easy but requires proper attention while following the process. The process depends upon bike to bike, so before that, you should read the instruction manual of your bike model and then start to process. Proper knowledge and guidance will provide more efficient results. So let’s get started.
How To Remove A motorcycle Battery
Step 1: Read The Instruction Manual

If you will read the instruction manual carefully before you start to remove a battery then half of your difficulty and confusion will be finished. A good mechanic always needs to read a book or get proper guidance in order to process things smoothly. Reading the instruction manual will make things easy for you.
An instruction manual is best to have as it allows you to keep proper maintenance of your motorcycle. For other maintenance routines, you can take help from the instruction manual of your motorcycle and then follow some steps to easily remove its battery.
Step 2: Locate The Battery, and Then Access It
The first thing that you should do before you remove the motorcycle battery is to find it. After finding it, you have to access it in order to remove it. There is no specific location on which you can always find the battery; instead, its location differs from brand to brand. Some motorcycle batteries are located at the upper right fairing, usually in Ducati Multistrada and Yamaha FJR1300.
For some motorcycles, like the Harley-Davidson Sportster, its batteries are located below the seat. Some models (Yamaha) have batteries, which are located under the fuel tank. The Harley Shovelhead batteries are present on the right side of the motorcycle. Some motorcycle batteries are present in the tail portion and in between the primary pulleys.
Step 3: Turn Off and Remove the Negative Cables
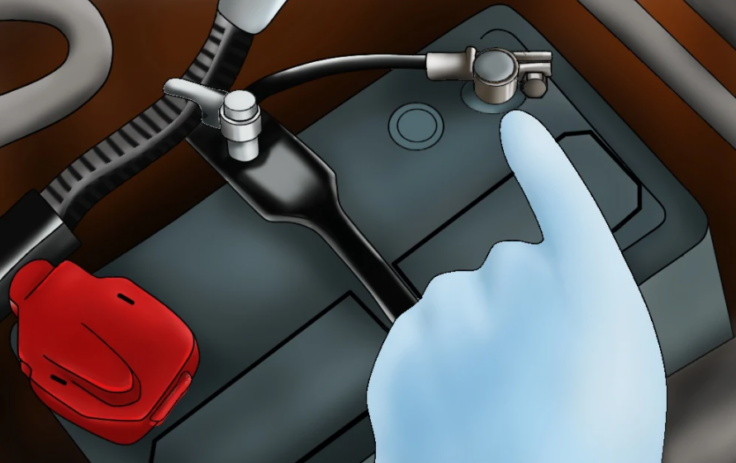
For removing the battery first, you have to disconnect the negative cables. You can easily find the negative cable marked with the ‘’-’’ sign. This negative cable is black in color, and nothing will happen if you unplug it. Positive cables may cause a problem if you remove them first, so for the safe side, it’s better that you unplug the negative cables first.
Removing the negative cable first will reduce the chances of battery drainage and even burning yourself. After removing the negative cable, you have to put it apart and seal that area with the tape in order to make accidental contacts and prevent further damages.
Step 4: Turn Off and Remove the Positive Cables

Now after removing the negative cable, you can remove the positive cable as the circuit is broken. This cable is red and the marked sign of the positive cable is the ‘’+’’ sign. Once you have located the positive cable, then you can simply unplug it. If straps come in the way while you are removing the positive cables, then remove them too.
Step 5: Remove The Battery
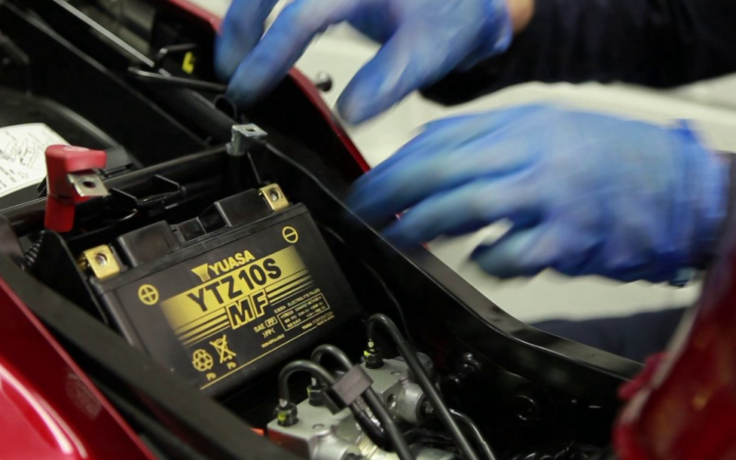
As all the steps are precisely done now, you can remove the battery. Before you just pull out the battery, make sure that all the other circuit connections are removed and disconnected too. For the safe side, you have to pull every other connection out. It could be anything, a metal bracket, rubber straps, and foam blocks.
These are securing hold, which keeps the battery at its place while you are riding. If you remove any of these parts, then you have to remember the proper connecting locations. While removing it, you should take care that you do not misplace any nut or a single bolt. Now, carefully remove the battery and put it in a neat and tidy place for appropriate examination.
Installation Of A Motorcycle Battery
Step 6: Install a New Battery

For installing a new battery, there are many elements that you need to check. Firstly, you should install the same size battery. Secondly, the power of the old battery should be the same as the previous one. Thirdly, examine the positive and negative terminals. Fill the acid in your battery before installing so that you may not spill it on your bike.
Not all motorcycles come with a battery with acid, so check before you put an acid. Also, if your bike battery is acid type then you should fill it accordingly. Once you fill the acid, after that close it with a nozzle so that it does not spill out of it. While installing it, you should be very careful with the chemicals to prevent accidents. After this, install the new battery or recharge the old one.
Step 7: Plug The Cables Again
After installing the battery, you have to plug in the cables again accurately. Now you can attach the cables easily and you can even do replacements of plugs if there is corrosion in it. Now, while replugging you have to plug the positive cable first before plugging the negative cable.
The wrong installation of wires will cause a blown fuse or electrical damage. To prevent corrosion, you can use a spray, which will delay the corrosion problem. Double-check before the cable attachment before you snug it tightly. To get the best results, you can just hook up the cables with the proper nuts.
Step 8: Test The Battery
Before finalizing everything, you just have to plug in the keys and give the power to check that it’s working properly. If you see the lights in the motorcycle, then it means that you have done your job perfectly. Now make sure that every connection is properly set and tightly fixed. It is important to test the battery so that you may not face further issues related to it. If everything is perfect as before, it means you are done.
FAQs
Which terminal do you hook up first on a motorcycle battery?
While you are unplugging the cables, you have to unplug the negative cable first and then the positive cable. But, when you are hooking up the cables again you have to hook up the positive cable first and then the negative cable, which is opposite to unplugging.
How do I install a motorcycle battery?
The process of installing a motorcycle battery is easy if followed precisely. Firstly you have to locate the battery so that you can make proper access. Then unplug the negative cable and then the positive one. After that, remove the battery, now recharge the old one or install the new one. After installing, plug the cables again, but this time plug the positive cable before the negative.
Can you charge a motorcycle battery while still connected?
No, you cannot charge the motorcycle battery while it’s connected. It will cause damage to the electrical connections and might burn you as well. The risk of damages will increase while you charge the battery when it’s still connected.
How long should you charge a motorcycle battery?
It depends upon the charge and battery health. But if you want to recharge the whole battery then it requires almost a day to recharge it. Sometimes it takes less (2-3 hours) as well but while charging make sure that you do not overcharge it.
How often should a motorcycle battery be replaced?
A motorcycle battery is strong enough that you can use it for years. But, for the safe side, you can replace the battery after three to five years. An acid-filled battery lasts up to two to five years.
Conclusion
Well, now you can easily change your motorcycle battery at your home by just following the steps. You can recharge the old battery, and also, you can install the new battery. Both ways (recharging the old and replacing the old one) require the same procedure. You just need to follow the steps accurately so that you don’t make any mistakes in order to prevent mishaps.

